


The rental market has been on fire for some time now. Certain estimates show that within the last 12 months, HDB rental has increased, on average, by 19% and 23% for condominium units.
In extreme cases, especially among the higher-end private properties usually rented by expats, prices have jumped anywhere between 40% to even a crazy 110% increase as reported by Bloomberg. That’s more than double the asking price when the unit was first rented out.
This puts Singapore on par with New York for having the highest growth rate for rental prices in the world. And it means that we are, quite literally, living in a landlord’s dream.
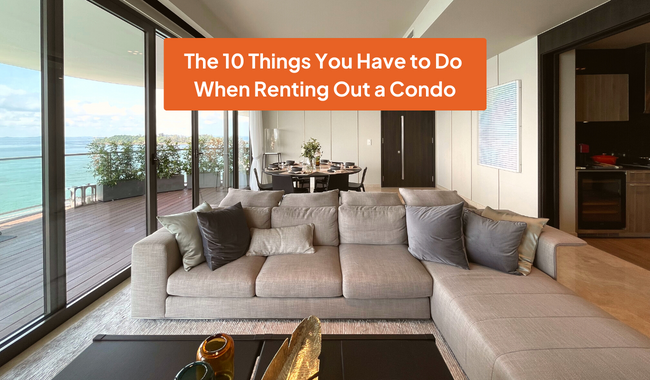
If you own a private property and have aspirations of collecting such high rentals, this guide will walk you through the process of renting out a condo — one step at a time. (If you’re a HDB owner, you can read our guide for renting out flats here.)
Here’s an overview of the steps we’ll be guiding you through. Feel free to click on any one of them to get to the step you’re at or need more information about:
Step 1: Check your eligibility
Step 2: Take beautiful pictures of your house
Step 3: Post your flat for rent
Step 5: Arrange viewings and ask your tenant to make an offer
Step 6: Collect Letter of Intent and Good Faith Deposit
Step 7: Issue Tenancy Agreement
Step 9: Get the TA stamped via IRAS
Step 1: Check your eligibility
Unlike with HDB flats, there aren’t that many eligibility conditions for you to rent out your private property or condo. You won’t have to wait for your property to reach MOP (because there is none) and there’s no non-citizen quota to think about.
If you want to rent out your private property or condo, you can do so, even if you’re a Permanent Resident or foreigner.
But there are some rules you have to follow:
- You cannot rent out the whole unit or room for less than 3 months, unless approved by the URA.
- You can only rent to a maximum of 6 unrelated tenants. The occupancy guideline does not apply if the entire unit is occupied by a family with no subletting involved.
Step 2: Take beautiful pictures of your house

Once you’ve decided you want to rent out your home, you can start by taking pictures of your living spaces and rooms for your property listing.
Now, the difference between a good listing image and a bad one has much to do with lighting, angles, and the actual state of your home. If it’s cluttered with personal items, then it’s going to look just as messy in your listing.
So if photos can speak a thousand words, then your listing image should be saying, This is the home of your dreams.
Here are some tips for a good listing photo:
- Find good lighting to accentuate the interior design of your flat
- Declutter your home so it looks clean and organised in the listing
- Play with angles to bring out the spaciousness of your flat
- Pick the best shot as the cover image
Step 3: Post your flat for rent
Now that you have your listing images ready, it’s time to put your listing up on property portals. And lucky for you, you can post your listing for free on Ohmyhome. Our app also allows you to chat with tenants directly, so remember to turn on your notifications to see any enquiries from interested tenants immediately. Here’s how you can do that:
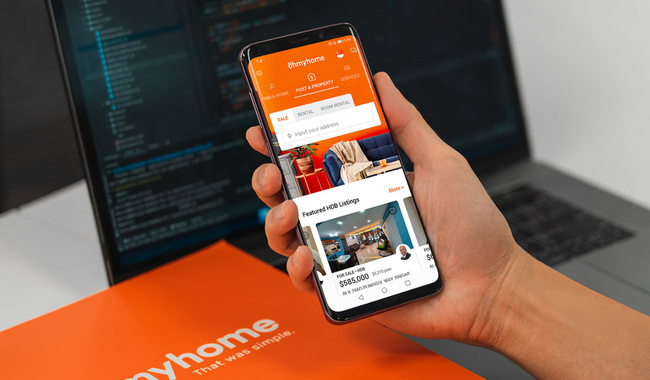
- Create an account using either your Facebook, Gmail or mobile number
- Choose your journey and select I am a ‘Landlord’
- Tap ‘My Properties > Choose Home Rental
- Enter your Postal Code > Choose the address of your property > select property type and other details
- Upload beautiful photos of your home rental and ‘Post’
We also just rolled out our Manual Verification feature on the Ohmyhome app, which allows private property owners who list their homes for rent (and for sale) to be verified and gain the trust of all interested parties on Ohmyhome. This simply means you can now prove, through our Manual Verification process, that you do own your home and are the legal owner of the property. This is part of our continued effort to improve trust on our platform and protect our tenants from rental scams.
Step 4: Find your tenant
You can also view public ShoutOuts of tenants’ property preferences, such as their budget, number of rooms they’re looking for and location. Let’s say Tenant A is looking for a 3-room HDB flat in Clementi that’s under $600,000. If you see this ShoutOut on the app, you can click ‘Suggest Listing’ and start up a conversation with Tenant A directly. No upfront costs whatsoever.
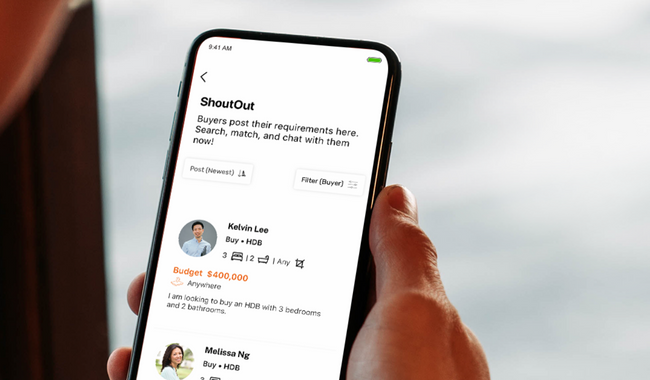
Here’s how you can find your ideal tenant via Ohmyhome’s ShoutOut function in 3 simple steps:
- Log in to Ohmyhome
- Tap ‘More’ at the bottom options
- View ShoutOuts
You can also customise your search even further:
- Click ‘Filter’
- You can choose anything from budget to nationality and gender
- Tap ‘Done’
Once you’ve found a tenant who fits all your requirements, you can immediately suggest your listing to them.
You can download the Ohmyhome app here. It’s available on App Store and Google Play.
Step 5: Arrange viewings & ask your tenant to make an offer
After suggesting your listing to an interested tenant, you can continue the conversation and arrange for a viewing appointment. We talk more about what you need to do before a viewing in this article.
This when you can also nudge them towards making an offer: within the chat thread, the tenant can select the button ‘Make an Offer’. This tidies up your records and provides easy reference when necessary.
Step 6: Collection of Letter of Intent (LOI) and Good Faith Deposit

You may also ask for an LOI and a good faith deposit to ensure the tenant is serious about renting your private property or condo.
Now, what’s an LOI?
Think of the LOI as an early draft of the Tenancy Agreement, which will act as the preliminary agreement between you (the landlord) and the tenant before the deal is finalised.
It’s a formal written document from your potential tenant that express their intent to rent your home, and may include:
- The rental price
- Start and end date of the lease
- You and your tenants’ particulars
- Terms that your tenant wants to include in the TA
- Specific requests such as furniture and house cleaning
What’s a good faith deposit?
It typically refers to 1 month’s rent, either for a 1-year lease or 2-year lease, to be paid with the issuance of LOI. The good faith deposit can also be converted to the 1st month’s rent.
Once you receive both the LOI and good faith deposit, you must stop advertising your unit. But if you reject the LOI, the good faith deposit must be returned to the tenant.
Step 7: Issue Tenancy Agreement (TA)
The TA is the official document that defines the terms and conditions between you and the tenant.
The most important details of a TA are:
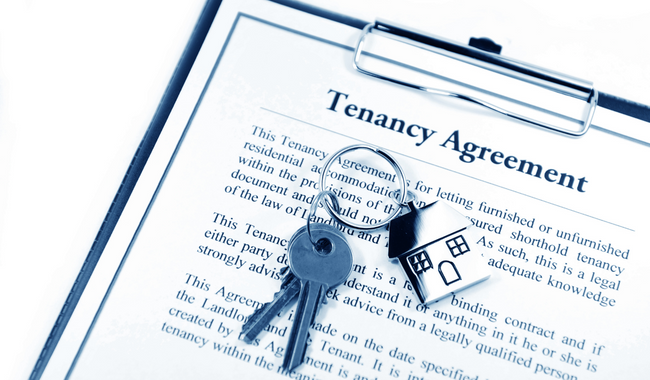
- Landlord and Tenant (including NRIC/Work Pass)
- If your tenant is a foreigner, ensure that the company’s address is stated in the TA
- Lease term (price, duration, start an end date)
- Security deposit (1-year lease = 1 month rent)
- Minor repair costs (approx. $200-$250)
- Air-con servicing
Step 8: Finalise the TA
Once both you and tenant have agreed on the terms and conditions in the TA, both parties will need to sign the document. This will give you a legally binding Tenancy Agreement.
Pro Tip: Make sure that there are respective witnesses during the signing of the agreement.
Step 9: Get the TA stamped on IRAS
You will also need to get the TA stamped within 14 days of signing it. This is to be handled by your tenant. He/she can bring it to the post office or simply go to IRAS’ e-stamping portal to do so.
If the tenant is overseas and they’re signing the TA outside of the country, the TA has to be stamped within 3 days of arriving in Singapore.
Step 10: Hand over the unit
Now that all the nitty gritty is done, you can now hand over your private property or condo to the tenant. You will have to provide an inventory list for your tenant prior to this, which contains a list of all the items in the apartment with a brief description of its condition.
If you’ve reached this stage…
Congratulations! You’ve now successfully rented out your private property or condo!
Renting out your home can be simple, especially when you’ve found your ideal tenant. But it can be even simpler if you prepare now.
Take this time to prepare well, and maximise your chances of having a successful rental. You can start by downloading our app on Apple Store or Google Play. And if you have any questions about renting out your property, you can contact us via any of the links below.